What’s up Dragon Ball Super fans!
Recently, I played in the Canadian Webcam Championships for the Dragon Ball Super Card Game and managed to secure a Top 16 (11th place) finish. Depending on your competitive point of reference, that might not seem like much but for those interested, I piloted a pretty rogue leader – Hatchhyack.
Going into the event, I was largely unaware of the competitive meta landscape. Due to the lockdowns and restrictions on in-person play, I stopped following the competitive DBSCG scene for quite some time.
Going into the Vicious Rejuvenation meta, I knew that Red Broly, and Vegeks were quite strong. A few nights before the event I looked up some recent PPG tournaments and saw that Dark Broly was another a top tier deck in addition to a spattering of Mecha Frieza, Starterku, Syn Shenron, Invoker and Majin Vegeta.
In terms of match-up experience, I was very unprepared. I knew of Red Broly, Vegeks and Invoker, but little experience with any these decks. That put me in a weird spot. Ultimately, I made these assumptions about the meta:
- The meta is fairly aggro (I was expecting a lot of Vegeks and Red Broly in particular).
- Most of the battle cards in these aggro decks (and honestly most other decks) are all 7 or less energy.
- Not all decks play Unison cards, and for many that do, they aren’t very threatening as attackers.
- People mainly test against the meta only.
This led me to return to the last competitive deck I seriously played – Hatchhyack.
Choosing Hatchhyack
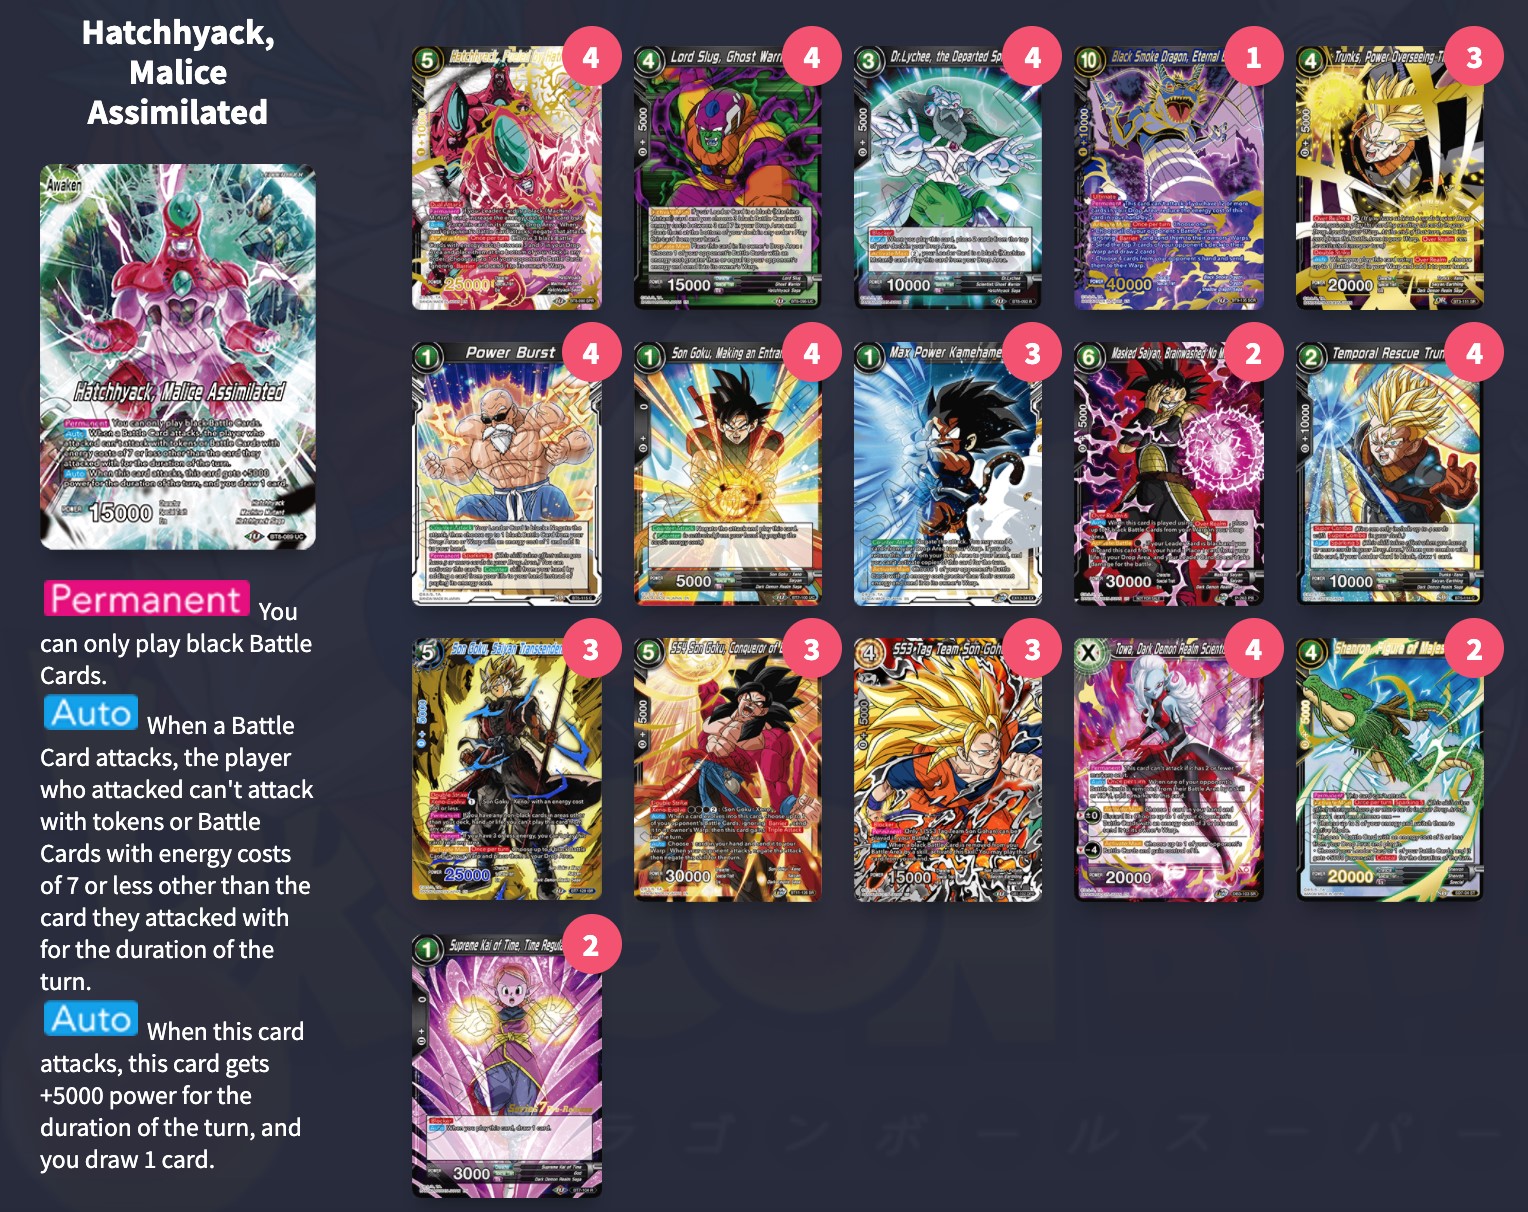
For those new to the Hatchhyack Leader, it has a powerful Auto Skill where each turn, when that player attacks with a battle card with 7 or less energy, they cannot attack with any other battle cards with 7 or less energy. In other words, most decks can only attack at most 3 times per turn – once with leader, a unison card and finally a battle card. Most of the time, my opponents either didn’t play a unison or their unison wasn’t strong enough to attack my leader. In those match-ups, I really only needed to deal with 2 attacks per turn.
Hatchhyack was a decent meta call because I knew that if I could stop most of the attacks every turn, most decks would eventually run out of steam and either deck out or simply lose to several win conditions I included in the deck. Since I had pretty much no idea of how a lot of these decks worked, I figured that negating or blocking each attack would mitigate the need to understand too many things. Essentially, I would have to learn each match-up on the spot and I felt that Hatchhyack, given the right tools would give me enough time to do so. The hard part was building a good enough deck purely based on theory craft without play testing it.
Note: The list I’m showing here is a slightly updated version of what I played during the event but the core is the same – I just increased the card counts on some items
Main Board
The general idea of this list was to be as defensive as possible. In theory, Hatchhyack can win a game while remaining above 5/6 life. I’ll go over each card in the order that they appear in the list.
Hatchhyack, Fueled by Hatred
This is a universal removal that can be recycled infinitely with its Activate: Main Skill as well as Lord Slug, Ghost Warrior. It warps ignoring barrier and has a powerful auto that allows it to become a negate. This card typically comes out during the late game (turn 5 and beyond) to remove large threats while also bypassing your leader’s Auto skill since it becomes an 8 drop when in play. Ideally, this can clear 2 battle cards by attacking and then a third using its main skill and finally serve as a negate. That’s almost the equivalent of having 4 negates. I play this at 4 copies since you will almost always encounter late game threats that you would like to remove.

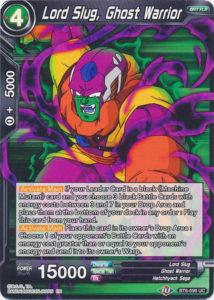
Lord Slug, Ghost Warrior
Many meta decks cheat battle cards out whose original energy costs exceed their current energy. This card allows you to slow the game down to a point where you can hide behind your blockers and negates even more. In many cases, you waste your opponents turn by clearing out whatever they spent their turn playing. Moreover, it’s virtually free to play. Running this alongside Hatchhyack, Fueled by Hatred allows you to have an “infinite” deck. This means you can’t run out of cards since you are always recovering battle cards between 3 and 7 energy from your Drop Area. Lord Slug is also at 4 copies since it’s something that you always want in hand in case your opponent drops something threatening.
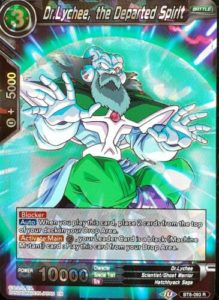
Dr. Lychee, the Departed Spirit
This is the workhorse of the deck. For 2 energy, you can play this card from your drop area, mill 2 cards from your deck and serve as a blocker. The mill 2 is very beneficial for the deck since it directly fuels the abilities of Lord Slug, Ghost Warrior and Hatchhyack, Fueled by Hatred. Furthermore, since you mainly play this from your Drop Area, the card is essentially “infinite”. I played this at 4 copies – when in doubt or if you have extra energy to burn, just play more Dr. Lychee – can’t lose the game when your opponent is always blocked right?
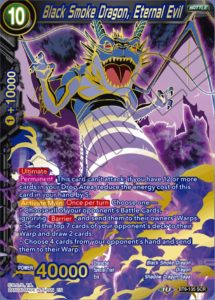
Black Smoke Dragon
This is the best SCR for this deck in my opinion. This single cards gives you three extremely powerful effects. Since your opponent will have a hard time dealing damage to your life, your games will typically last a very long time – usually to the point where your opponent deck starts to become very thin. If you time it well enough, you can shock your opponent with a surprise deck out (I managed to pull this off on stream!)
In other cases, as you amass a board of blockers while hoarding negates in your hand and having multiple attacking Hatchhyack‘s in play, you will eventually force your opponent to defend their board. Black Smoke Dragon helps greatly by forcing your opponent to warp 4 cards of your choice – reducing their ability to defend their own life.
Lastly, if your opponent decides to go wide or they have multiple non-barrier threats on board, you can use Black Smoke Dragon to wipe your opponents board forcing them to commit resources in building back their position. Overall this is a highly flexible SCR that gives this deck multiple routes to victory.
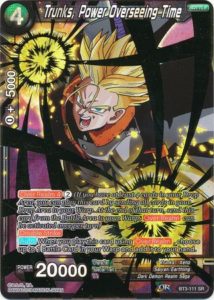
Trunks, Power Overseeing Time
I originally played this at 2 copies but later increased it to 3. The main purpose of this card is to recover battle cards that aren’t normally recycled by Hatchhyack and Lord Slug (Battle cards between 3 and 7) such as Black Smoke Dragon or giving you immediate access to battle cards in your Drop Area. This card is a mandatory inclusion in the list in my opinion because it’s possible to mill the SCR during the early turns of the game. Furthermore, it has 20K double strike which is just a solid bonus after you resolve the auto skill.
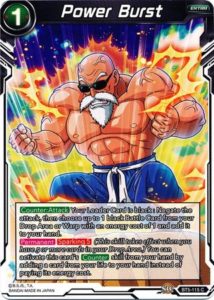
Power Burst, Son Goku Making an Entrance & Max Power Kamehameha
This is the negate package. In total, you play 11 hard copies of a negate. In game, you actually have access to much more than that. Power burst is an Extra Card that you typically keep in your opening hand. If you mill it, then you will never get it back. Not too big of a deal though if you consider its secondary effect which allows you to bring back into your hand a black battle card with an energy cost of 1 from your Drop Area or Warp.
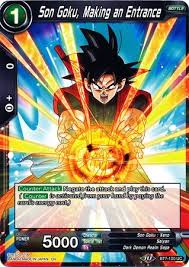
Your primary target is Son Goku, Making an Entrance which conveniently is also a negate. Essentially, in this deck your Power Bursts replace themselves by recovering a Son Goku, Making an Entrance. In theory, you can use all 4 copies of Son Goku, Making an Entrance, then bring them all back with 4 negates from Power Burst, and then use them all again for a total of 12 negates.
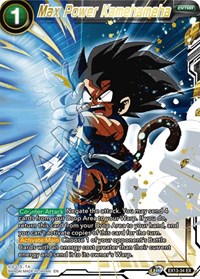
To make the negate package stronger, I also included 3 copies of Max Power Kamehameha. This card is very versatile since you can use it in two ways. It’s Activate: Main Skill is like Lord Slug’s ability which allows you to warp high-energy cost threats. However, in this deck you can use it as an infinitely accessible negate. When you declare a negate with this card, you can warp 4 cards from your Drop Area to bring this card back into your hand. As we will see later, you can easily recover those 4 cards you sent to your warp back into your Drop Area allowing you to continuously recycle those cards. Considering all the blockers and negates I mentioned prior, having an infinitely accessible negate just makes it harder for your opponent to beat you.
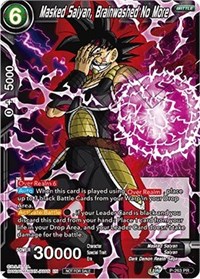
Masked Saiyan, Brainwashed No More
This card is an extremely powerful safeguard in the deck as well as a bait. Your opponent for whatever reason could try and push your life aggressively, either to the point where you have low life (e.g. 2 life and you’re being threatened by a Mira/FD Champa) or they’re just trying to aggro you in the early turns and hope to finish what could potentially be a long game.
Imagine a turn where your opponent decides to play a Mira/ FD Champa combo on you and they dump their entire hand thinking they’re going to take your last 2 life. You can simply bait them by feigning a weak hand, then during your battle step after they commit their hand to combo, Activate: Battle and ultimately take 1 life instead of 2, potentially representing the end of your opponents turn if they’ve already exhausted all their attacks. I play this card at 2 copies since I usually will ever only resolve this effect once per game as well as to compensate for the chance of locking it away in my life. Furthermore, since it has an energy cost between 3 and 7, I can infinitely recycle this card back into my deck incase I ever need to see it multiple times.
Temporal Rescue Trunks
As much as I like the new SS Vegeta, the Prince Strikes Back, I typically play most games above 4 life and so Trunks became my Super Combo of choice. It has good synergy with Dr Lychee since it becomes fully active once you have 5 cards in your Drop Area.

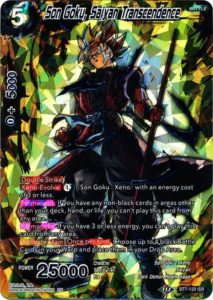
Son Goku, Saiyan Transcendence
One of the challenges of Hatchhyack is that much of your game strategy is intimately tied to your Drop Area. When things end up in your Warp, whether it be from using Trunks, Power Overseeing Time or your opponent using Warp targeted removal skills, you could exhaust your own resources. This card pretty much solves that issue and comes into play for an extremely cheap cost. For a single energy, it Xeno:Evolves onto a <Son Goku:Xeno> which you already rely on in the form of negates that come into play as battle cards. Additionally, returning 4 cards from your Warp to your Drop Area completely nullifies the cost of returning Max Power Kamehameha to your hand. Offsetting that cost is what allows it to be truly infinite. I play this card at 3 copies as it can also be infinitely recycled back into my deck.
SS4 Son Goku, Conqueror of Evil
For many people, this is a lackluster SR that either sits in a binder or in a bulk SR pile. I however think it has a perfect home in Hatchhyack. Similar to Son Goku, Saiyan Transcendence, this card Xeno: Evolve’s on to a Goku:Xeno but with an extremely powerful effect. When this comes into play it can warp a battle card ignoring barrier – basically becoming extra copies of Hatchhyack, Fueled by Hatred. In fact, it even has an auto that allows you to negate an attack by discarding a card. This basically turns any card in your into a negate.
What separates this from Hatchhyack, Fueled by Hatred is that when it evolves, it gains Triple Attack. As I mentioned earlier with Black Smoke Dragon, you can pair the threat of a hand wipe with a Triple Attack + Double Strike, forcing your opponent to take multiple damage from an otherwise mainly defensive deck. I felt that this alternate win condition allowed me to surprise my opponents by shocking them with a tempo change. I play this card at 3 copies to see it enough times but also, like many other cards in the deck is infinitely accessible because it’s between 3 and 7 energy and will be recycled back into my deck.

SS3 Tag Team, Son Gohan
One of the main ways to get past your blockers is by removing them using the effects of skills. When that happens, you trigger this card’s Auto skill which essentially replaces your 10k Dr Lychee blocker with a stronger 15k blocker (and guess what, it’s also between 3 and 7 energy so you will see it many times throughout a single game as you recycle it back into your deck). Furthermore, you can play this card proactively when you Xeno:Evolve or send Lord Slug to your Drop Area with its Activate:Main effect. I originally had this at 4 copies in previous iterations of my list but I ultimately shaved it down to 3. This didn’t prove to be too problematic since I saw it often enough and as I mentioned earlier it’s recyclable.

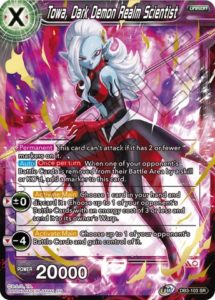
Towa, Dark Demon Realm Scientist
This is probably my favorite card in the deck. When building the deck, I envisioned 2 main uses for it. In the early game, I planned to use its (-1) ability against Dark Power Black Masked Saiyan and other annoying battle cards with 3 or less energy. In that sense, it was another source of removal for the early turns in case my opponent was not playing high energy battle cards for my Lord Slugs to wipe.
More exciting though was its (-4) ability which allowed me to gain control of one of my opponents battle cards. The longer the game lasted, the better the cards my opponent played, which ultimately became juicier targets for me to steal. In the tournament, I played a few matches where my opponent would awaken and manage to pump out a Heartfelt Plea whose attacks I promptly negated. Next turn I simply took control of it and redirected my opponents pressure back at them. In that regard, not only did I get to remove a card from my opponent’s board, but I also gained the full value of that card for myself. Since this card had good use in the early game, was non-recyclable and a potential late game upset, I played this at 4 copies.
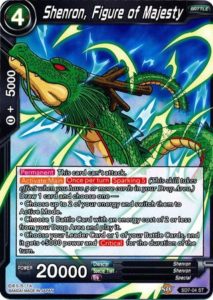
Shenron, Figure of Majesty
For most decks, this is not a good card at all. To tap out for 4 energy to play a non-attacking battle card in this meta is just not rewarding for many strategies. However, in a slow defensive deck like mine, this (recyclable) 4 drop gave my deck an insane energy economy.
Often, I would need to spend energy to play down my expensive 5 drops or multiple Dr. Lychee’s. This left me tapped out and unable to access many of the negates in my hand. Shenron allowed me to untap 2 energies every turn and draw a card making it an extremely useful piece on board. In theory, tapping out on turn five is not an issue because Shenron allows me to untap 2 energy. If I ever had 2 Shenrons in play, I could untap 4 energies a turn. In those scenarios, it became possible to create an extremely defensive turn where I could spend 4 energy to play 2 Dr Lychees and then untap the same four energies to play 2 more Dr Lychees or just have them open to spend on negates.
Alternatively, I could produce an extremely aggressive turn where I could play a Black Smoke Dragon, untap 4 energies and then play a Son Goku, Conqueror of Evil. In summary, Shenron gave me the potential to combine two turns worth of actions into one.
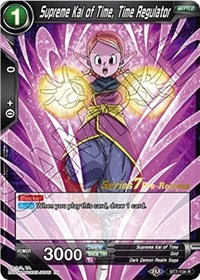
Supreme Kai of Time, Time Regulator
At first it seemed strange to me to add more blockers beyond Dr. Lychee and SS3 Gohan but I fortunately remembered how useful I found this 1 drop to be during the late game. From experience, I remembered there were some turns where I either didn’t want to spend 2 energies on a Dr. Lychee or I just wanted some extra card draw. Having access to more defensive options on turn 1 greatly improved my survivability against reboot Gohan back when I tested against it during the BT9 meta.
One of the main synergies I discovered later was with Shenron, Figure of Majesty. Shenron can Activate:Main to draw 1 card and choose from 3 abilities. One of which is to play a battle card with 2 or less energy from my Drop Area. If my target was the Supreme Kai, that meant that I could retrigger her Auto Skill and draw an additional card while playing a blocker. Having access to a recurring 1 drop blocker with double card draw allowed me to cycle through my deck very quickly without sacrificing my defensive potential. I play this card at 2 copies because I really only need to see 1, but the second doesn’t hurt and can compensate for the chance of placing the other in life.
PSA: You can legally stack your deck in Hatchhyack during the late game
Between all the card draw and mill effects in this deck, you will burn through your deck very quickly, eventually to the point where you start to encounter the cards that you recovered from your Drop Area. At this point, you are seeing exclusively the battle cards between 3 and 7 energy that you have sent from your Drop Area to the bottom of your deck using Hatchhyack and Lord Slug’s abilities. More importantly, you are seeing them in the exact order in which you placed them. This is very important because your deck is now under your complete control. If you are good enough, you can plan and predict each card you draw from that point onwards. This can make for some very efficient turns without the need to dig for cards that you would otherwise see by chance!
Side Board
The concept of a sideboard is a strange one for Hatchhyack. Typically, your opponent will burn through ~30-40 min playing the first game in a BO3 just because Hatchhyack is so defensive. If the second game requires an additional 30-40 min of game time, then it will never conclude leaving you the winner by default (nullifying the need for a sideboard). If you lost that first game, you probably lost the series and should get lunch and wait for your next round.
However, I won’t say that a sideboard is completely unimportant for Hatchhyack. Sometimes, even if you do win game 1, maybe you got lucky, or you managed to squeak by with a lucky draw, or you anticipate your opponent bringing in cards that will significantly improve their ability to break through your defenses. In those scenarios, then the sideboard becomes a useful consideration.

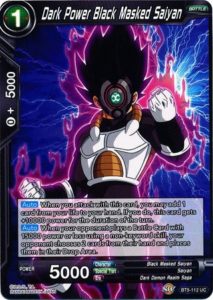
Dark Power Black Masked Saiyan
It seems like there have always been so many cheatable battle cards that are 15k or less in every meta since this card was printed. In our current format, it’s truer than ever. Bringing in 3 copies of this card (which are Power Burst targets and re-playable with Shenron, Figure of Majesty) can seriously mitigate both your opponents setup and aggression.
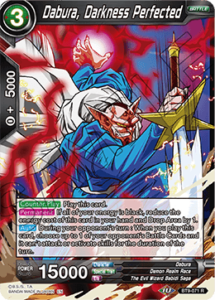
Dabura, Darkness Perfected
This card is one of the most blatant Hatchhyack effect dodges I have ever seen on a card. It seems like Bandai knew it would be unbalanced if Hatchhyack could recycle a counterplay that blanked battle cards. Nonetheless it remains a powerful tool. I keep this in the side simply because it’s not recyclable and not always needed. Going back to a BO3 context, maybe you got lucky in game 1 because your opponent didn’t manage to find their own Black Smoke Dragon or some other card with an game ending skill. At that point, you can bring in Dabura to give yourself a layer of protection against powerful skills on battle cards that you can remove after they pass the turn back to you. Essentially, it has the potential of wasting an otherwise game ending turn for your opponent.
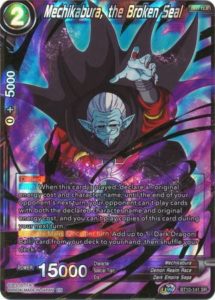
Mechikabura, the Broken Seal
This card is extremely powerful if you are playing against decks that are either based around a single type of card (E.g. Dark Broly with energy costs of 6) or follow a very linear and predictable strategy. You can use Mechikabura to disrupt your opponent’s normal setup or gameplan simply by declaring the card you think they will most likely play next turn. Often times, people say “oh if I had another turn I would have won”. Mechikabura can literally buy you a turn in some matchups. I play this at 3 copies because that’s all I own; would definitely play 4.
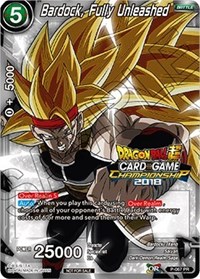
Bardock, Fully Unleashed
Hatchhyack Leader’s Auto skill restricts the attacks of battle cards with energy costs of 7 or less. One of the weaknesses of this leader is if it ever goes up against a deck that can pump out 8 drops and higher. Typically, I have found this to be the case against G/Y Successor and Syn Shenron. In those matchups, you need a quick and reliable way of not only clearing an 8 drop or higher, but also wiping your opponents board. Typically, it takes a considerable amount of resources to pump out an 8+ battle card. When you consider the potential amount of resources needed to develop multiple 8+ assets, you can really punish your opponent with a well-timed Bardock. I play this at 3 copies and not 4 because I usually only need to see 1 copy of this and it is also recyclable.
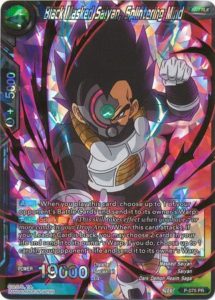
Black Masked Saiyan, Splintering Mind
There are a handful of decks that aggressively ping their own life and/or are comfortable sitting below 4 life. Since Hatchhyack manages to maintain a relatively high life count, you can exploit that difference with Black Masked Saiyan. You can often surprise your opponent by hand dumping their 2nd last life and then securing the game by attacking with this. Even if it’s attack is negated, the effect will still go through so long as you can pay the cost of its Auto skill. I play this at a single copy since I only ever need to use it once, I have it on demand with Trunks, Power Overseeing Time and if needed, I can recycle it back into my deck.
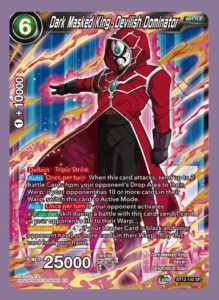
Dark Masked King, Devilish Dominator
This is a card that I wish I brought to the tournament but unfortunately did not own any at the time. At first glance, this card has a great ability but for a niche scenario. It requires your opponent to have several cards in their own Warp for you to gain maximum value from playing it. Turns out, Dark Broly maintains a relatively large warp pile and more decks are including overrealm attackers in their lists again. Timed well this card can land in play for 4 energies (which you could all untap with Shenron, Figure of Majesty) and punish your opponents for building their Warp. I play this card at 2 copies since it is only useful in niche scenarios. Like Black Masked Saiyan, Splintering Mind, this card is also a quick target for Trunks, Power Overseeing Time and recyclable.
Going forward, I think Hatchhyack has the potential to do well so long as it doesn’t encounter some seriously bad matchups. I consider Invoker to be an auto loss. Syn Shenron is rough since they outblock you with the added ability to bloodlust your own blockers as well. Depending on how hot R/G alliance builds run, they can bypass your blocks and negates with guaranteed damage. The silver lining here is that these are not the most popular decks in the format. Depending on your local meta or even a competetive event like the Canadian Webcam Championships, Hatchhyack could be a great meta call.
Keep up to date about all things board games on The Bag of Loot! https://www.thebagofloot.com/
Get everything Dragon Ball Super at Three Kings Loot! https://www.threekingsloot.com/
